
International Data Group
IDC TechMatch

Achieving high buyer confidence by leveraging trusted data and artificial intelligence.
IDG, Inc is a leader in technology data. I developed a self-service tool to assist CTOs, CIOs and procurement teams in purchasing their next enterprise software. To increase buyers’ confidence, we incorporated our historical data insights and artificial intelligence.
The Highlights
Increased buyer confidence in software selection
→ Designed an AI-powered experience that combines IDC’s research with dynamic vendor scoring for informed decision-making.
Streamlined RFP creation and collaboration
→ Optimized workflows to help teams generate, customize, and align on RFPs efficiently, reducing sourcing complexity.
Enhanced transparency in AI-driven recommendations
→ Created intuitive scoring and filtering tools that clearly explain vendor matches, fostering trust in the selection process.
The Challenge
Improving buyer confidence in procurement
When I joined, TechMatch was in its early MVP stage. A design agency had just exited, and two contract designers had laid the groundwork for a component library and design system. My role was to lead UX design and bring coherence and user-centered thinking to the experience.
The concept was to create a tool that assists CTOs in purchasing their next enterprise software with AI suggestions. A recent poll stated that: 44% of CIOs said the complexity and high costs of sourcing enterprise software was their top issue. IDC TechMatch was designed to cut that effort in half.
Key challenges:
Aligning UX with a data-rich, AI-powered product
Clarifying and structuring incomplete user flows
Ensuring the product supported multi-stakeholder collaboration
Visualizing how AI and analyst-driven insights could support high-confidence decisions
The Process
Prioritizing design tasks
I synced with the product team to clarify the design requests and how they related to the business objectives. I wanted to prioritize tasks essential to keep the project on track.
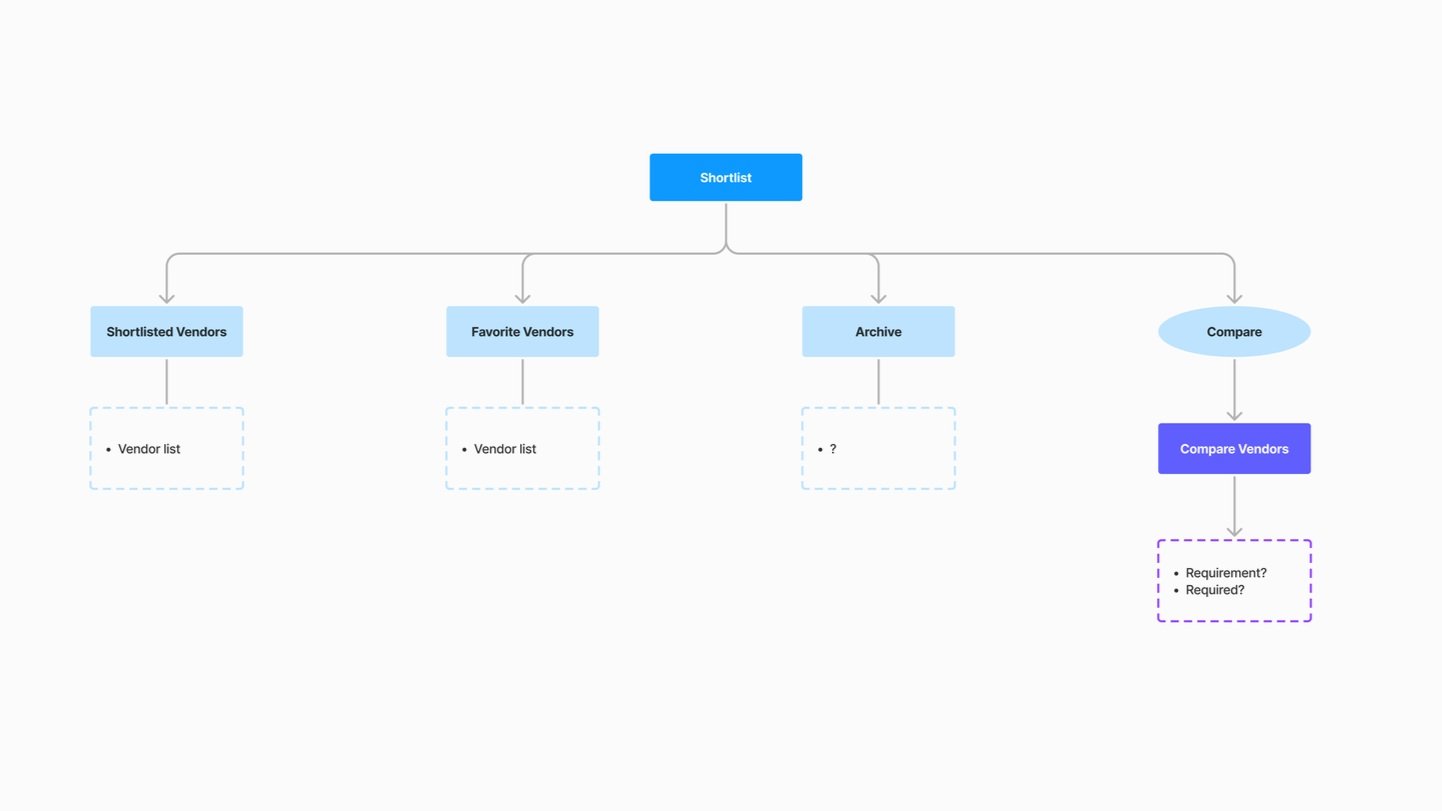
To accomplish this goal, I crafted an information architecture to organize the platform into key sections.
Key platform features:
Build custom software vendor shortlists
Generate RFPs (Requests for Proposal)
Collaborate across departments
Leverage IDC’s trusted market research and generative AI for tailored recommendations
I wanted to clearly display all the existing sections and pages designed and which ones we still needed to design for.
I separated the information by ‘Current IA’ and ‘Suggested IA’.
Information Architecture
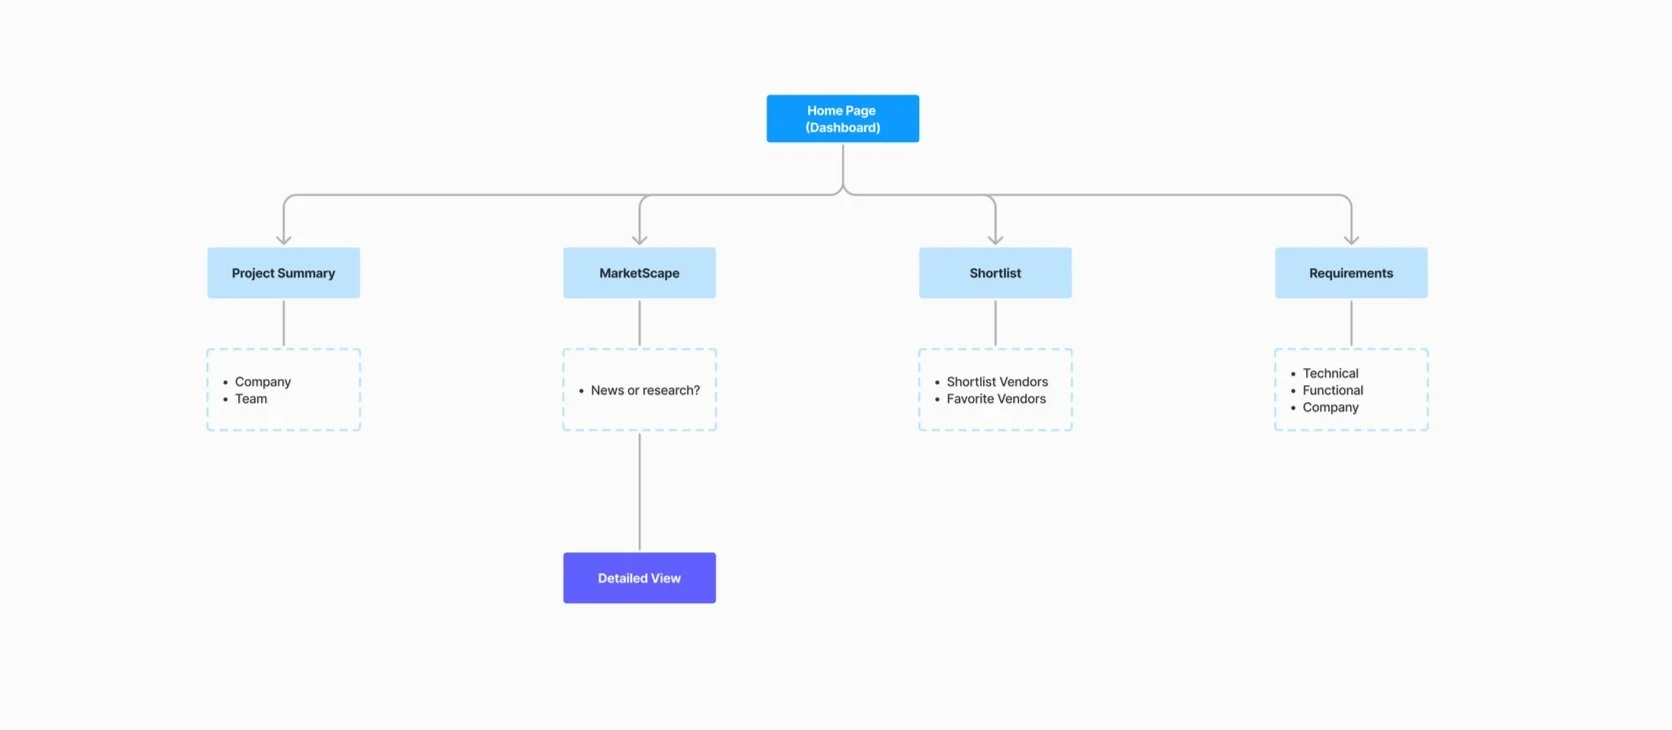

After displaying the overview of the current screen designs, I focused on the remaining sections that had not been designed yet. The remaining sections were ‘Teams’ and ‘RFP (Request For Proposal)’.
I first evaluated the request for the ‘Teams’ section with the Product Manager and concluded that it was more than a section and needed to be an Admin portal based on the reasons given.
The RFP section required a better understanding of the business goals to determine how I would design a solution for the platform.
Service Blueprint

I created a service blueprint to clearly define the user flow of the RFP and all the touchpoints between the user, technology, and recipient’s actions.
The Solution
Onboarding
Before

After

Home
Before

After

Requirements
Before

After

The Impact
I helped shape the foundation of TechMatch’s MVP by proactively defining the platform’s information architecture and mapping complex user flows, particularly for the RFP experience, one of the most critical features. My early collaboration across design, product, and engineering created clarity where ambiguity had slowed progress. I introduced service blueprints and structural diagrams that guided decisions and accelerated alignment across disciplines.
By building early artifacts and uncovering friction points before design began, I empowered the team to move faster with fewer surprises. This foresight was crucial as the project gained executive visibility and operated under tight deadlines. As a result, I helped the team hit launch milestones and reduce product risk.
TechMatch ultimately launched in Q1 2025 as the first AI-powered sourcing platform with embedded IDC market intelligence. According to IDC, 88% of IT executives expect AI to positively impact software sourcing, and TechMatch met that moment—cutting sourcing timelines from months to weeks and addressing the #1 concern of 44% of CIOs: cost and complexity. My contributions played a direct role in delivering a product that streamlines high-stakes enterprise decisions and positions IDC at the forefront of AI-driven research products.
Company
International Data Group
My Deliverables
Information Architecture, User Flow, Wireframing, Prototyping, Design QA
Timeline
3 Months (0 -1 Launch)
Tools
Figma, FigJam, Jira
Link
IDC TechMatch
Team
Uba: Product Design Consultant
Adam: VP, Product Management
Niraj: Product Manager
Joe: SVP, AI & Chief Scientist
And the rest of the TechMatch team